How to Create a DIY Dinosaur Halloween Costume

This post contains affiliate links, which means if you click and make a purchase, I'll get a small commission (and that helps keep my blog running). All products are ones I love and all opinions are my own.
Last year, B wore a pretty fun Halloween costume. I was also pretty proud of myself for DIY’ing that thing, so I thought it would be fun to post a tutorial on how you can also do-it-yourself (in case you also have a toddler who insists on being a dinosaur but generally refuses to wear costumes).
I started by sketching out my idea using pen and watercolor (note to self: probably should have used watercolor paper and not the mixed media stuff).

My watercolor sketch to plan out his costume
And from there, I got to work. I ordered a hoodie from Primary.com (get 20% off your first order!). I also ordered both shorts and pants because Halloween weather here in Charleston is super unpredictable.

Clothes from Primary.com and the rest of my supplies
Supply List
A hoodie in your child’s desired colored (my son very specifically wanted orange). I love the options from Primary. The quality is good, plus they have matching pants and shorts. I used the regular hoodie, but you can also buy a heavier one if you live in a colder climate.
At least two colors of crafting felt - one for spikes and one for the accent color on the spikes. You can use a third one if you want to put an accent color on the belly. I ended up not doing this.
Googly eyes (used large ones - about 2-inches). I didn’t use the self-adhesive since I thought just using that may fall off with all the activity of a toddler. I opted for stronger fabric glue. (Although, you could add glue to the self-adhesive ones for extra strength.)
Fabric glue. This kind is my favorite.
Needle, sewing pins, and thread
Directions
Using the pattern (linked at the end of this blog post), determine the appropriate size for your spikes (it will vary based on your child's clothing size).
Cut out the large spikes and trace them onto your felt. Do the same for the smaller accent color spikes.
Do the same for the tail, but cut two of them. You'll need both.
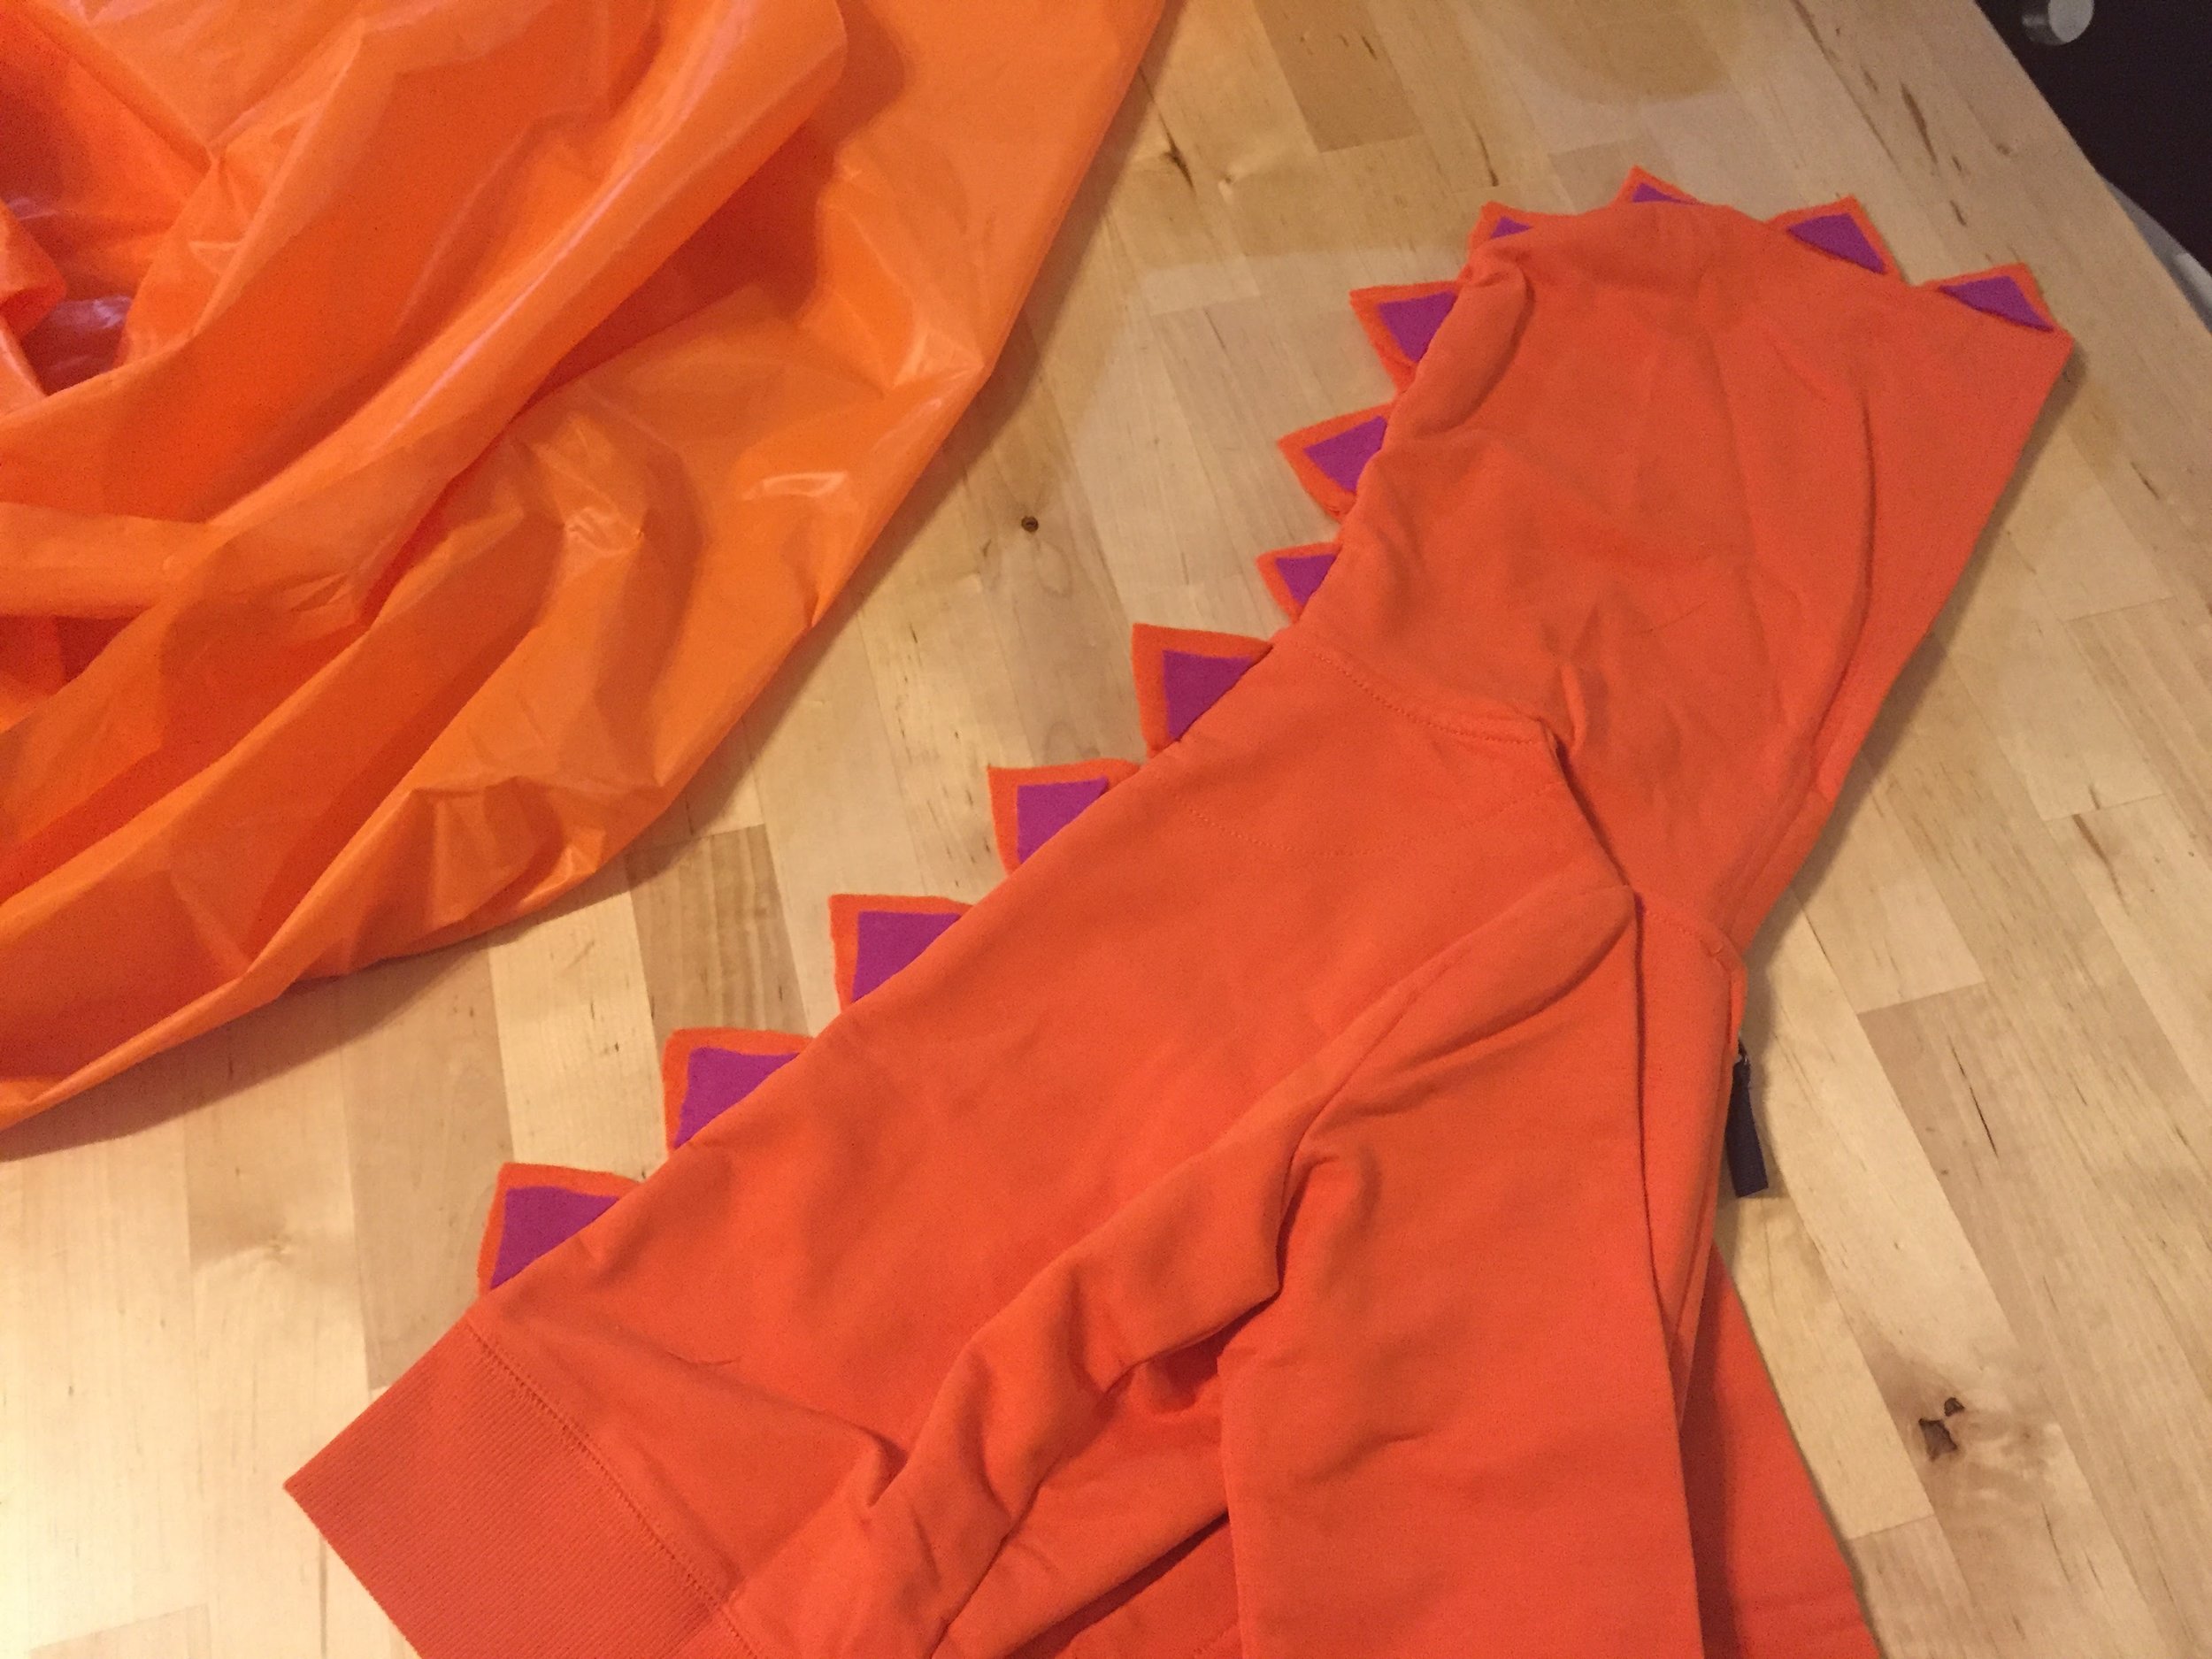
Fold the large spikes in half and iron them so the fold stays.
Pin the large spikes onto the hoodie, then sew them down the center.

Once the spikes are sewn on, glue the two sides together with permanent fabric glue. Let dry.
Glue the accent triangles onto the spikes. Let dry.
Using the tab on the base of the tail, fold them so they overlap each other, pin to the base of the sweatshirt, and sew. Then glue the two sides together like you did with the spikes, adding in the tail spike before you close the two sides. Add the accent triangles to the tail.
Glue on the googly eyes.


Let everything sit for a day or two to make sure the glue is completely set.
Watch your child have fun in their unique costume!
I hope you enjoyed this little tutorial and please feel free to comment if you have questions!
This year, we’re going to do a slight variation because his dinosaur obsession continues. Instead of an orange stegosaurus, he’s going to be a black spinosaurus. Wish me luck on that one. If all goes well, I’ll post that tutorial, too.
Have you ever DIY’d your child’s Halloween costume?